Calibrating Your Nozzle Offset
For new users, calibrating the nozzle offset of your 3D printer is one of the most important and often overlooked features, which can have a drastic impact on the success of your 3D prints. If the nozzle offset is off by as little as 0.2mm, your print can suffer from issues such as layer separation, part warping, and brittleness.
The process of calibrating your nozzle offset is the same for most printers, with only a few exceptions.
Note: The process shown below is performed on a custom-built printer, and the offset will be adjusted manually without the use of the BLTouch probe.
1. Start with a clean nozzle
The first step in this process is to ensure that your nozzle is completely clean, and is devoid of any excess filament buildup on the tip -- this can negatively affect the calibration. If there is excess buildup, you can either cut the filament off with flush-cutters or heat the nozzle and wipe away the excess. Note: If the nozzle is hot during this process, this may cause some of the filament to slowly seep out, but should not affect the offset setting.
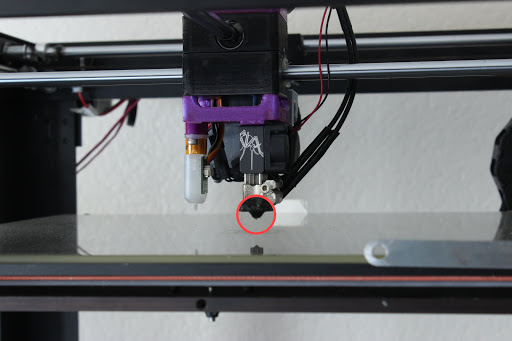
2. Home the printer
Next, you will need to home the printer in all three axes, and then move the nozzle to the center of the build area. Depending on your printer type, you will then lower the nozzle near to the build plate, or raise the build plate up near to the nozzle. There should be a slight gap (offset) between the nozzle and the build plate.
If there is no gap, you will need to adjust the z-offset to increase the offset before proceeding.
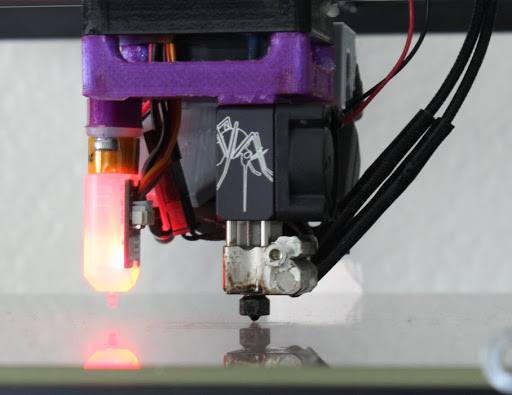
3. Check for clearance
Once your nozzle is near to the build plate, slide a single sheet of paper in between the nozzle and build plate. If you are not able to slide the paper under the nozzle, you should adjust the z-offset to allow for more clearance.

4. Slide the paper and adjust
Now you will need to adjust the nozzle offset until the nozzle touches the paper to the bed with just enough resistance to feel like sandpaper -- the paper should still be able to slide under the nozzle with little resistance.
- If you move the paper and it bunches up, you will need to increase your offset.
- If you cannot feel any resistance, bring the nozzle closer until it feels like sandpaper
It is recommended to initially adjust the nozzle offset by increments of 0.1mm as needed. When you feel resistance on the paper, back the nozzle off by 0.1mm, and then proceed with adjusting the nozzle offset by increments of 0.02mm when fine-tuning.
You can see the short clips below to understand the paper motion:
Bad Nozzle offset (you need to increase the offset)
Good Nozzle Offset (light sandpaper feel)
5. You're all done!
With your nozzle offset now properly calibrated, you can begin your 3D printing adventure with a solid foundation!
Please be sure to check out some of our other calibration How-To's for more tips and tricks in succeeding in the world of 3D printing!